Get a Jump Start on this Growing Season
By Marisa Thompson

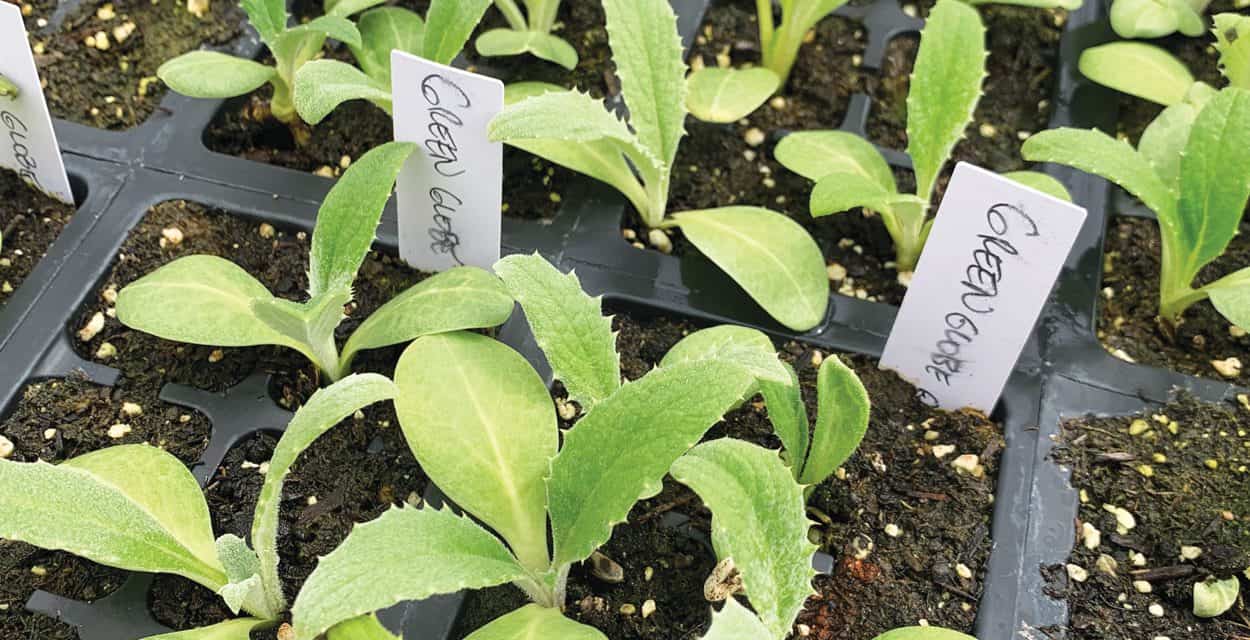
Artichoke seedlings. Photo by Marisa Thompson.
Starting seeds is an exciting time for highly skilled gardeners. For the rest of us, this process can be burdensome and frustrating. Start too early and your cute little sprouts get yellow and leggy way before it’s warm enough to move them outside. Start too late and you might as well just plant directly in the ground—there was no need for all the trays and TLC. Forget to water for three minutes and the whole tray of seedlings kicks the bucket. Set the trays outside for a sunny afternoon and shriek when you remember in the middle of the frosty night that they’re still out there. Frostbitten leaves, limp and slimy, have an especially pathetic look that cultivates guilt in the heart of any gardener. From losing the carefully written labels and over-fertilizing to watering with such a high-spray volume that the seeds—and all the soil with them—get washed way over to the other side of the tray, I’ve done it all. I’m here to help you face the fears of seed-starting failure with tips and resources. Let’s give it a grow.
Consider the basics: soil, humidity, water, heat, light, and timing.
Soil
Soil isn’t the best medium for seed starting because better germination results are expected when using soilless media—a mix of loose, fine-textured, well-drained materials that support new roots without holding too much water. Whether you purchase it premixed or buy the ingredients separately, a combination of peat moss (or coco peat) and vermiculite or perlite is recommended. Sand is another common ingredient. To reuse your growing media again and again, gently remove loose material from roots before transplanting and be sure to sterilize it before reuse. One way to sterilize soilless media (or soil) is to bake it in the oven at 350°F using metal or glass containers, adding a few foil-wrapped potatoes in there too. When the potatoes are cooked, the soil is sterile. I found this tip in the New Mexico State University (NMSU) Extension Guide H-112, “Seed Propagation of Plants” (aces.nmsu.edu/pubs/_h/H112).
Humidity
This is a tough one to regulate in New Mexico. Using a humidifier, I am able to raise the humidity in my seed-starting room from 27 percent to 70 percent. Covering the seed tray to seal in moisture is another tried-and-true method. Remove or raise the cover once the sprouts appear.
Water
The trick is keeping the growing media moist without being soggy—standing water is a big no-no. Three things that will help are 1) pre-soaking the mix before seeding, 2) a spray bottle for misting seedlings as they emerge, 3) good drainage. Actually, good drainage won’t just help; it’s essential.

Heat
For quick seed germination, soil temperatures between 65°F and 75°F are considered optimal. Note that air temperature is usually several degrees warmer than moist growing media. If the space you’re using is colder, a space heater or germination mat under the seed tray can really help speed up the process.
Light
After seeds germinate and sprouts emerge, sufficient light becomes important quickly. Unfortunately, window light is not bright enough to keep most seedlings from becoming leggy. Leggy seedlings have long stems and are usually either leaning over or about to start leaning. They look fragile for a reason. While they might survive transplanting and perform well, the chances get slimmer as the stem gets taller. For larger-scale production, fluorescent grow lights will significantly transform your operation. If you don’t have supplemental lighting, you’ll need to move seedlings outside for sufficient light. This is where timing comes in.
Timing and the Myth about
Maturity
Figuring out exactly when to start seeds indoors so they’re ready to move outside as soon as the threat of last frosts has passed can seem nearly impossible in New Mexico. But luckily, because some plants can be harvested at different stages in their growth, the official maturity of a plant is not always a limiting factor. The first step is to figure out the average last frost date for your area so that you know when it’s safe to transplant. Once you know that, you can calculate back and start your plants four to eight weeks sooner, depending on the size you want the transplants.
Using the data provided at weather.gov/abq/springfreezetable, I see that the last average frost in Los Lunas is April 29. However, back in 1975, it was May 23! That amount of variability between the average and the extreme is the norm across the state. My advice is to stagger your seed-starting efforts. If your first set of seedlings gets too leggy before it’s safe to move outside, that’s OK. Start another round, even in the same tray.
That brings us back to the myth of maturity. Have you noticed on the back of seed packets where it lists details like “Days to Germination” and “Days to Maturity”? Sometimes the wording is different, like “Plants emerge in 10–21 days” or “55 Days to Harvest.”
Those guidelines are helpful for growers making important decisions about planting dates for warm-season veggies, like okra, chiles, melons, and tomatoes. For example, if a plant has fifty-five days to maturity, but the anticipated first freeze of autumn is only fifty days away, then the plant very well might not reach full maturity because of a killing freeze. But many plants grow well or better in the cool season, like parsnips, kale, and beets. For them, the first frost isn’t a death sentence; it’s grow time. And consider those that produce edible leaves long before their final maturity date. This brings up an important but seldom-mentioned distinction between commercial-scale production of mature crops and backyard growing; home gardeners can continually collect smaller portions throughout the season while plants keep growing.
For some veggies, the mature product is a fruit that needs to reach maturity before harvesting, such as pumpkins and eggplants. In these cases, the maturity date makes sense and is useful. But consider arugula, kale, basil, beets, chives, and all sorts of lettuces. The mature final product may be a complete head of lettuce that took seven to fourteen weeks to mature, but individual leaves can be harvested within days of sprouting. And, as long as you don’t take too much at once, you can keep harvesting for months. The trick is to only harvest outer, older leaves, and leave the center of the plant, the meristem, intact so it can keep growing and producing new leaves.
Or maybe your goal is to grow microgreens, which in some cases can be harvested in as little as one to two weeks. Depending on the species and how the sprouts are harvested, they may be able to regrow from the roots. Pea shoots are an example of a microgreen that can keep growing after harvesting.
Squash are expected to take six to eight weeks until the first ripe fruit are ready for picking. But if you’re more excited about cooking the flowers, you can plant much later and still harvest flowers before the first frost. Squash blossoms can start opening within about four weeks after planting.
The point is that growing guidelines are usually written for large-scale agriculture. Perhaps more than ever, this year many people will be starting seeds at home for the first time, and on a relatively small scale. See below for a list of resources focused on local growing conditions. The bottom line is that gardeners learn quickly to be flexible and “grow with the flow.” Don’t dismay if your seedlings fail and you find yourself buying vegetable starts at the local nursery in late June. I’ll see you there.
Additional Resources
Recent webinar recording “Starting Seeds Indoors” with Nissa Patterson, which is part of NMSU’s ongoing Ready, Set, GROW! gardening series: desertblooms.nmsu.edu/ready-set-grow.html
NMSU Extension Guide H-220, “Starting Plants Early Outdoors”: aces.nmsu.edu/pubs/_h/H220/
NMSU Extension Circular 457, “Home Vegetable Gardening in New Mexico”: aces.nmsu.edu/pubs/_circulars/CR457.pdf
NMSU Extension Circular 457-B, “Growing Zones, Recommended Crop Varieties, and Planting and Harvesting Information for Home Vegetable Gardens in New Mexico”: aces.nmsu.edu/pubs/_circulars/CR457B.pdf
NMSU Extension Guide H-112, “Seed Propagation of Plants”: aces.nmsu.edu/pubs/_h/H112
Edible celebrates New Mexico's food culture, season by season. We believe that knowing where our food comes from is a powerful thing. With our high-quality, aesthetically pleasing and informative publication, we inspire readers to support and celebrate the growers, producers, chefs, beverage and food artisans, and other food professionals in our community.


